- Published on
Setting Up a Homelab with Portainer and Nginx Proxy Manager – Free SSL & Domain (Part 2)
- Authors

- Name
- Khoa (Atlas Labs)
- Occupation
- Full-stack developer
In the previous part, we explored the concept of a homelab and the outstanding benefits it provides. In this Part 2, you will be guided step by step on how to set up Portainer and Nginx Proxy Manager in your homelab. Moreover, we'll explore how to integrate free SSL and configure a domain, making your system more secure and professional at no cost!
1. What is Portainer? Why Use Portainer in a Homelab?
Portainer is a Docker management tool based on a graphical user interface (GUI), making it easy to monitor and control containers. Instead of having to remember complex commands, Portainer provides an intuitive, user-friendly interface for beginners.
Benefits of using Portainer in a homelab:
- Easy management: Track all containers, images, and networks.
- Time saving: Create, delete, and manage services with just a few clicks.
- Safe and efficient: Manage access permissions, integrate with other tools easily.
2. Step-by-Step Portainer Installation Guide
Step 1: Install Docker
First, you need to install Docker on your operating system. Below are the commands to install Docker on Ubuntu:
sudo apt update sudo apt install docker.io
Then, check if Docker was installed successfully:
docker --version
Step 2: Install Portainer
After Docker is installed, proceed to install Portainer with the following command:
docker volume create portainer_data docker run -d -p 9000:9000 -p 8000:8000 --name=portainer --restart=always \ -v /var/run/docker.sock:/var/run/docker.sock \ -v portainer_data:/data portainer/portainer-ce
Step 3: Access the Portainer Web UI
- Open a browser and navigate to
http://<IP>:9000. - Create a Portainer administrator account.
- Log in and start managing your Docker containers through the interface.
3. What is Nginx Proxy Manager? Its Role in a Homelab
Nginx Proxy Manager (NPM) is a tool that helps you manage proxies and issue SSL certificates for services in your homelab with ease. With NPM, you can configure reverse proxies, create SSL certificates, and manage domains without needing to know much about Nginx.
Benefits of Nginx Proxy Manager:
- Easy proxy host configuration.
- Free SSL integration via Let's Encrypt.
- Manage all domains from a single interface.
4. Nginx Proxy Manager Installation Guide
Step 1: Create the NPM Docker Container
Run the following command to install Nginx Proxy Manager:
docker run -d -p 80:80 -p 443:443 -p 81:81 --name=nginx-proxy-manager --restart=always \ -v /nginx/data:/data -v /nginx/letsencrypt:/etc/letsencrypt jc21/nginx-proxy-manager
Step 2: Access the NPM Interface
- Navigate to
http://<IP>:81. - Log in with the default credentials:
- Email:
[email protected] - Password:
changeme
- Email:
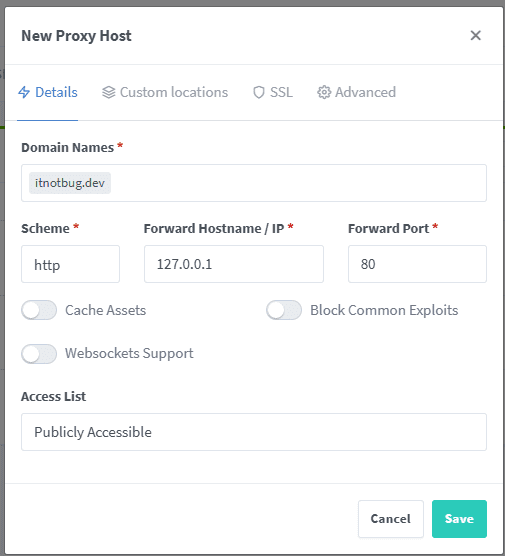
Step 3: Add a Proxy Host
- In the NPM interface, select "Proxy Hosts" > "Add Proxy Host."
- Enter the required information such as domain name, IP address, and service port.
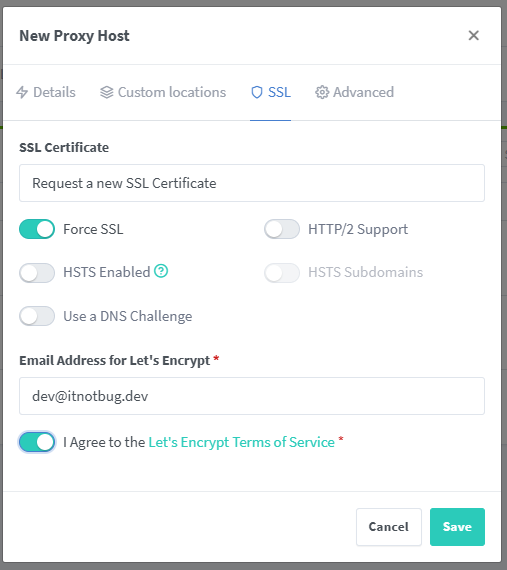
5. Free SSL Integration with Let's Encrypt
SSL encrypts the connection between users and the server, ensuring data security. Nginx Proxy Manager supports free SSL integration with Let's Encrypt in just a few simple steps.
How to set up free SSL:
- In the Proxy Host configuration section, go to the "SSL" tab.
- Select "Request a new SSL Certificate."
- Choose Let's Encrypt as the provider.
- Check "Force SSL" to enforce HTTPS.
6. Configuring a Free Domain for Your Homelab
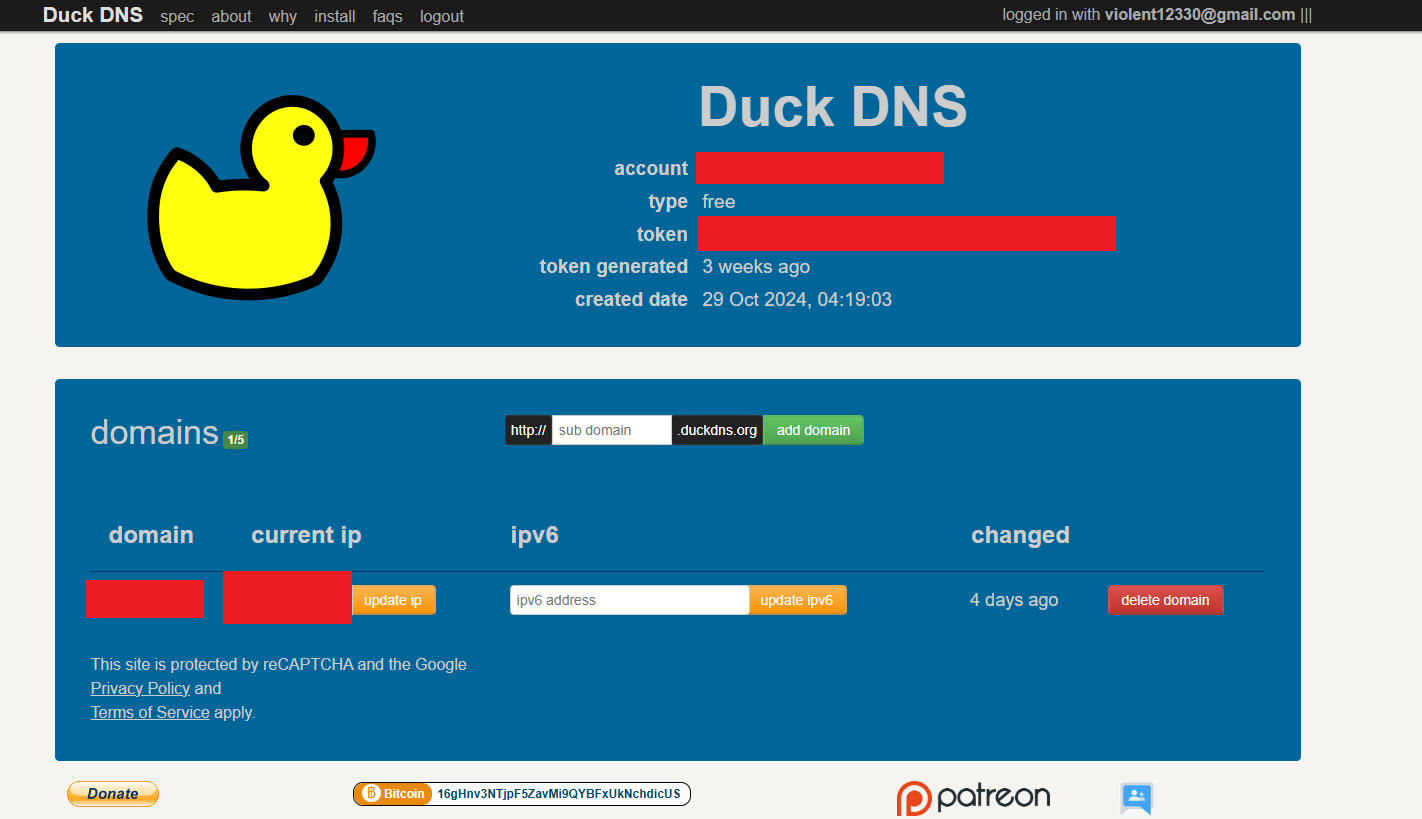
You can register a free domain through services like Freenom or DuckDNS. Then, point the domain to your public IP address.
Steps to point a domain:
- Visit Duck DNS
- Log in to your DNS account.
- Add an A record pointing to your homelab's IP.
- Verify in NPM that the domain has been recognized.
7. Tips for Managing Your Homelab with Portainer and Nginx Proxy Manager
- Regular backups: Ensure you back up the data and configurations of Portainer and NPM.
- Update versions: Always keep Docker, Portainer, and NPM up to date to avoid security vulnerabilities.
- Monitor resources: Use tools like Grafana or Prometheus to track homelab performance.
8. Summary
Building a homelab not only helps you save costs but is also a great opportunity to learn and develop technology skills. With Portainer and Nginx Proxy Manager, managing containers and proxy hosts has never been easier. Don't forget to integrate free SSL to secure your services!
Start deploying your homelab today and share your experience in the comments. If you need more guidance, feel free to reach out! 🚀