- Published on
Guide to Building a Comment System with Cloudflare Worker and D1 Database
- Authors

- Name
- Khoa (Atlas Labs)
- Occupation
- Full-stack developer
In the fast-moving world of technology, serverless is a prominent trend due to its flexibility, cost savings, and scalability. In particular, with the need to reduce server load and save costs, free hosting solutions have become the top priority for developers. In this article, we'll explore how to deploy a comment system using Cloudflare Worker and D1 Database to create an easy-to-manage, cost-optimized serverless platform.
Why Choose Serverless?
Traditionally, storing and managing data requires a physical or virtual server, leading to high costs and complex operations. With serverless, developers only need to focus on code and application logic without worrying about server infrastructure. This also means you only pay based on the amount of traffic and resources used, rather than a fixed cost.
Some benefits of serverless:
- Low cost: No need to pay for a server when no users are accessing.
- Easy scalability: Applications automatically scale based on actual demand.
- Easy maintenance: Focus on developing and upgrading features, without worrying about servers.
Overview of Cloudflare Worker and D1 Database
Cloudflare Worker is a serverless solution provided by Cloudflare, allowing you to deploy JavaScript applications directly at the network edge, thereby reducing load and processing time. D1 Database is Cloudflare's new relational database product, providing a developer-friendly data storage solution for serverless applications.
Step 1: Set Up the Environment
To get started, you need to create a Cloudflare account (free) and install Wrangler, Cloudflare's official CLI tool for deploying Workers.
# Install Wrangler CLI
npm install -g wrangler
# Log in to your Cloudflare account
wrangler login

#or
npx wrangler login
After logging in, you're ready to create a new Worker.
Step 2: Create the Worker for the Comment Feature
Initialize the Worker Project
# Create a new Worker project
npm create cloudflare@latest -- my-comment
#or
yarn create cloudflare@latest my-comment
After running the command above, follow these steps:
- For What would you like to start with?, choose
Hello World example. - For Which template would you like to use?, choose
Hello World Worker. - For Which language do you want to use?, choose
TypeScript. - For Do you want to use git for version control?, choose
Yes. - For Do you want to deploy your application?, choose
No(We'll need to change a few things before deploying).
After setup, you will have a directory structure like this. 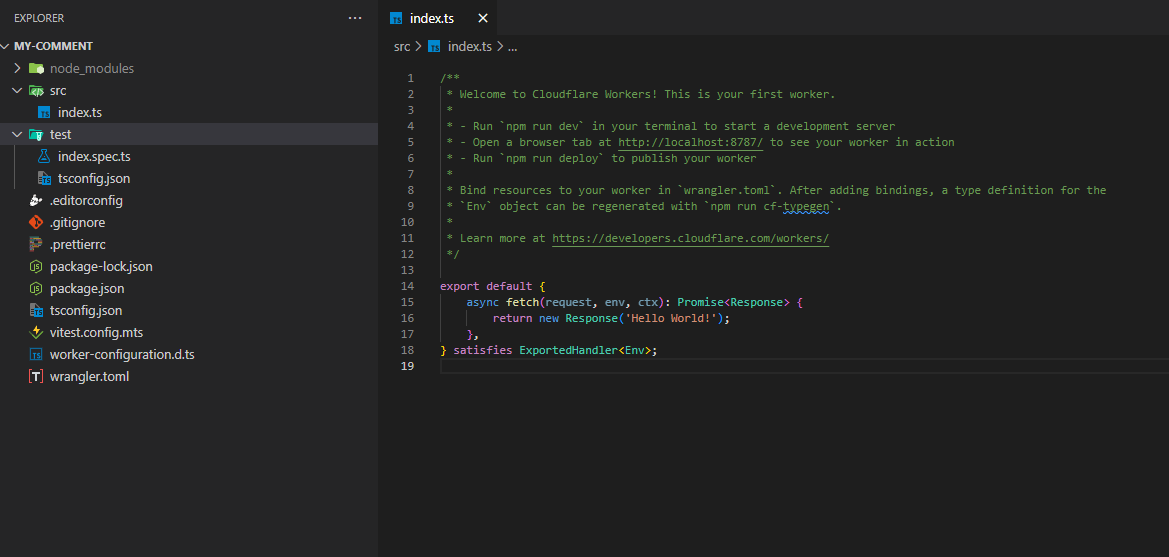
Configure the Worker
In the project directory, open the wrangler.toml file and update the configuration to connect to the D1 Database:
#:schema node_modules/wrangler/config-schema.json
name = "my-comment"
main = "src/index.ts"
compatibility_date = "2024-11-12"
compatibility_flags = ["nodejs_compat"]

[[d1_databases]]
#will be automatically Bound so we can easily connect
#for example:
# env.DB.prepare("SELECT * FROM users WHERE name = ?1").bind("Joe");
binding = "DB"
database_name = "my-comment-db"
database_id = "<D1_DATABASE_ID>""
migrations_dir = "migrations"
preview_database_id = "db" #database id used locally

#used to deploy UI
[assets]
directory = "./public"
binding = "ASSETS"
You will replace <D1_DATABASE_ID> with the actual ID of the D1 Database you created on Cloudflare.
Binding is a mechanism that grants permissions to a Worker, allowing it to access and interact with other resources on your Cloudflare account, such as reading and writing files to an R2 bucket. When you declare a binding, you don't need to provide secret keys or tokens; you just use the API provided by the binding. This helps keep sensitive information secure because secret keys are never exposed to Worker code.
Worker Code to Add and Retrieve Comments
Below is sample code to create an API for the comment feature. This Worker will receive new comments from users and store them in the D1 Database.
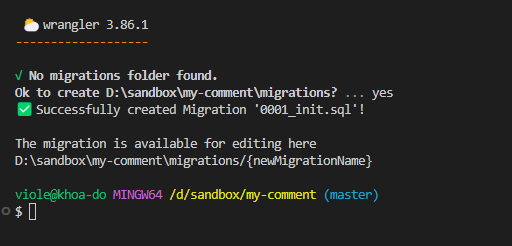
Create Migrations
To create a new migration, we use the following command.
npx wrangler d1 migrations create my-comment-db init
Since D1 works similarly to SQLite, we'll use SQLite syntax to create the "comment" table.
CREATE TABLE comments (
    id INTEGER PRIMARY KEY AUTOINCREMENT,
    post_id INTEGER NOT NULL,
    username TEXT NOT NULL,
    comment TEXT NOT NULL,
    created_at TIMESTAMP DEFAULT CURRENT_TIMESTAMP
);
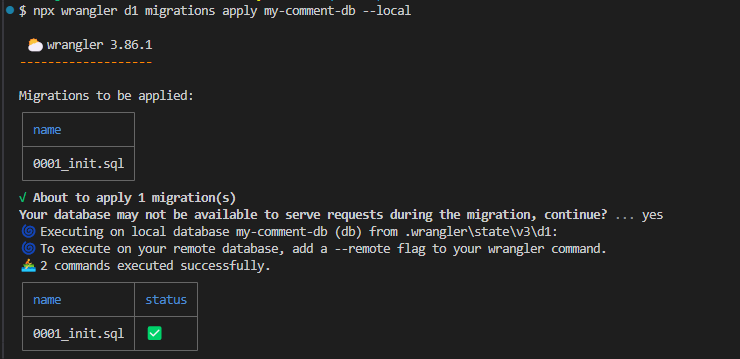
Then run this command to apply the migration.
npx wrangler d1 migrations apply my-comment-db --local
Open the index.ts file
export default {
    async fetch(request, env, ctx): Promise<Response> {
        const url = new URL(request.url);

        if (request.method === 'POST' && url.pathname === '/comment') {
            const { comment, username }: { comment: string; username: string } = await request.json();

            // Add comment to the database
            await env.DB.prepare('INSERT INTO comments (post_id, username, comment) VALUES (?, ?, ?)').bind(1, username, comment).run();

            return new Response(JSON.stringify({ message: 'Comment added' }), { status: 200 });
        } else if (request.method === 'GET' && url.pathname === '/comments') {
            const { results } = await env.DB.prepare('SELECT * FROM comments').all();
            return new Response(JSON.stringify(results), { status: 200 });
        } else {
            return new Response('Not found', { status: 404 });
        }
    },
} satisfies ExportedHandler<Env>;
Create public/index.html file
<!doctype html>
<html lang="en">
  <head>
    <meta charset="UTF-8" />
    <meta name="viewport" content="width=device-width, initial-scale=1.0" />
    <title>Document</title>
  </head>
  <body>
    Hello World
  </body>
</html>
After completing, let's run the application with the following command:
npm run dev
After running successfully, visit http://127.0.0.1:8787 and http://127.0.0.1:8787/comments to see the results.
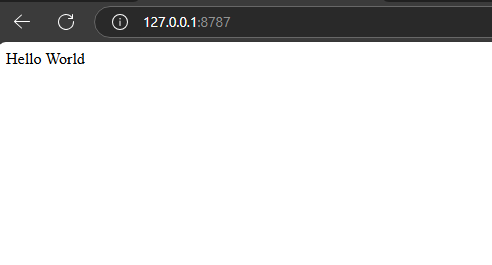

We've successfully connected to D1 and rendered the index.html file. Now we'll move on to connecting the Frontend and Backend together.
Step 3: Testing and Connecting Frontend - Backend
Now that you've completed configuring the comment feature on the serverless platform, you can test it using Postman or write a simple front-end interface to connect and display comments.
Simple Interface Code
Below is an example of how to use JavaScript to send comments from the front-end.
<!doctype html>
<html lang="en">
  <head>
    <meta charset="UTF-8" />
    <meta name="viewport" content="width=device-width, initial-scale=1.0" />
    <title>NFC Reader</title>
    <style>
      body {
        font-family: Arial, sans-serif;
        margin: 20px;
      }
      #commentForm {
        display: flex;
        flex-direction: column;
        max-width: 400px;
        margin: 0 auto;
      }
      #commentForm input,
      #commentForm textarea {
        margin-bottom: 10px;
        padding: 10px;
        border: 1px solid #ccc;
        border-radius: 4px;
        font-size: 16px;
      }
      #commentForm button {
        padding: 10px;
        background-color: #007bff;
        color: white;
        border: none;
        border-radius: 4px;
        font-size: 16px;
        cursor: pointer;
      }
      #commentForm button:hover {
        background-color: #0056b3;
      }
      #commentsList {
        list-style-type: none;
        padding: 0;
        max-width: 400px;
        margin: 20px auto 0;
      }
      #commentsList li {
        background-color: #f9f9f9;
        padding: 10px;
        border: 1px solid #ddd;
        border-radius: 4px;
        margin-bottom: 10px;
      }
    </style>
  </head>
  <body>
    <form id="commentForm">
      <input type="text" id="username" placeholder="Your name" required />
      <textarea id="comment" placeholder="Write a comment..." required></textarea>
      <button type="submit">Submit comment</button>
    </form>
    <ul id="commentsList"></ul>

    <script>
      document.getElementById('commentForm').onsubmit = async (e) => {
        e.preventDefault()
        const username = document.getElementById('username').value
        const comment = document.getElementById('comment').value

        await fetch('/comment', {
          method: 'POST',
          headers: { 'Content-Type': 'application/json' },
          body: JSON.stringify({ username, comment }),
        })
        loadComments()

        document.getElementById('commentForm').reset()
      }

      async function loadComments() {
        const response = await fetch('/comments')
        const comments = await response.json()
        const commentsList = document.getElementById('commentsList')
        commentsList.innerHTML = ''
        comments.reverse().forEach((comment) => {
          const li = document.createElement('li')
          li.textContent = `${comment.username}: ${comment.comment}`
          commentsList.appendChild(li)
        })
      }

      loadComments()
    </script>
  </body>
</html>
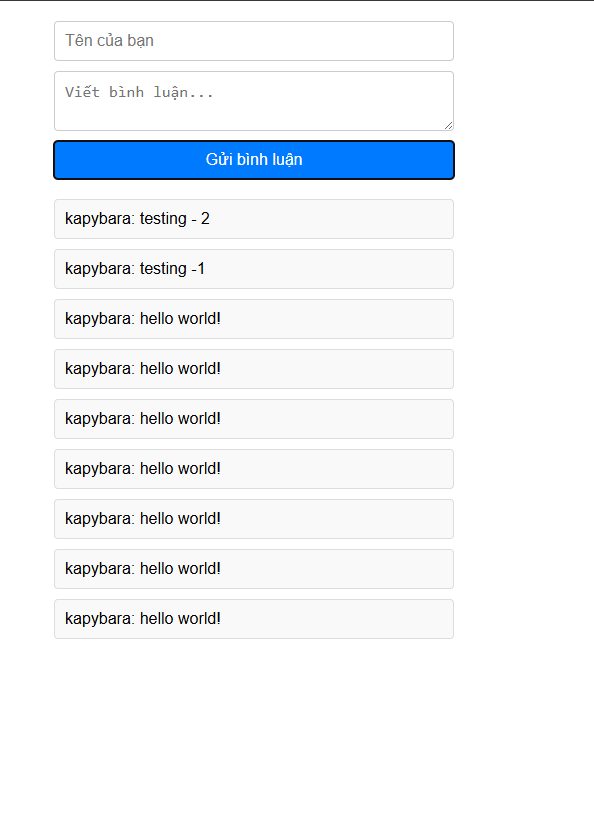
And here is the result:
Step 4: Deploy to Server
After testing and everything is working together, we'll proceed to deploy to the server.
yarn deploy
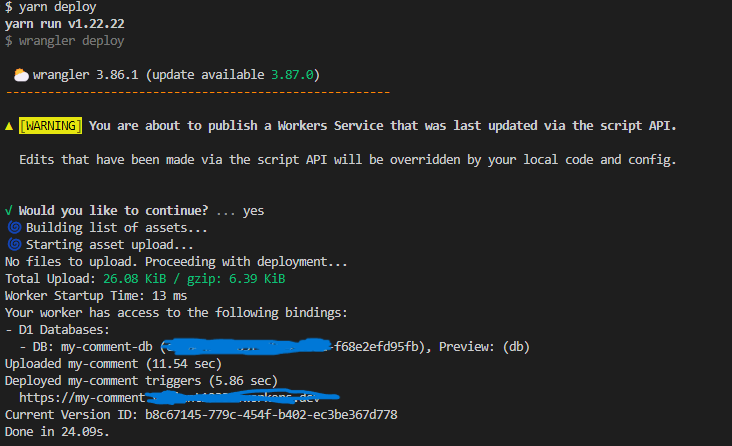
You have now deployed your application. Visit the provided URL and enjoy the results.
Conclusion
With Cloudflare Worker and D1 Database, you can build a free-hosted comment feature that is easy to scale without worrying about servers. This serverless solution not only helps reduce costs but also speeds up loading, improves the user experience, and is especially suitable for small businesses and personal projects.